Things have
been so busy with wedding season that I've completely neglected my blog. Today I've made up a little tutorial for
creating your own vintage inspired felt rose brooch. With the colder weather now
here is perfect for pinning onto your coat or favorite cardigan.
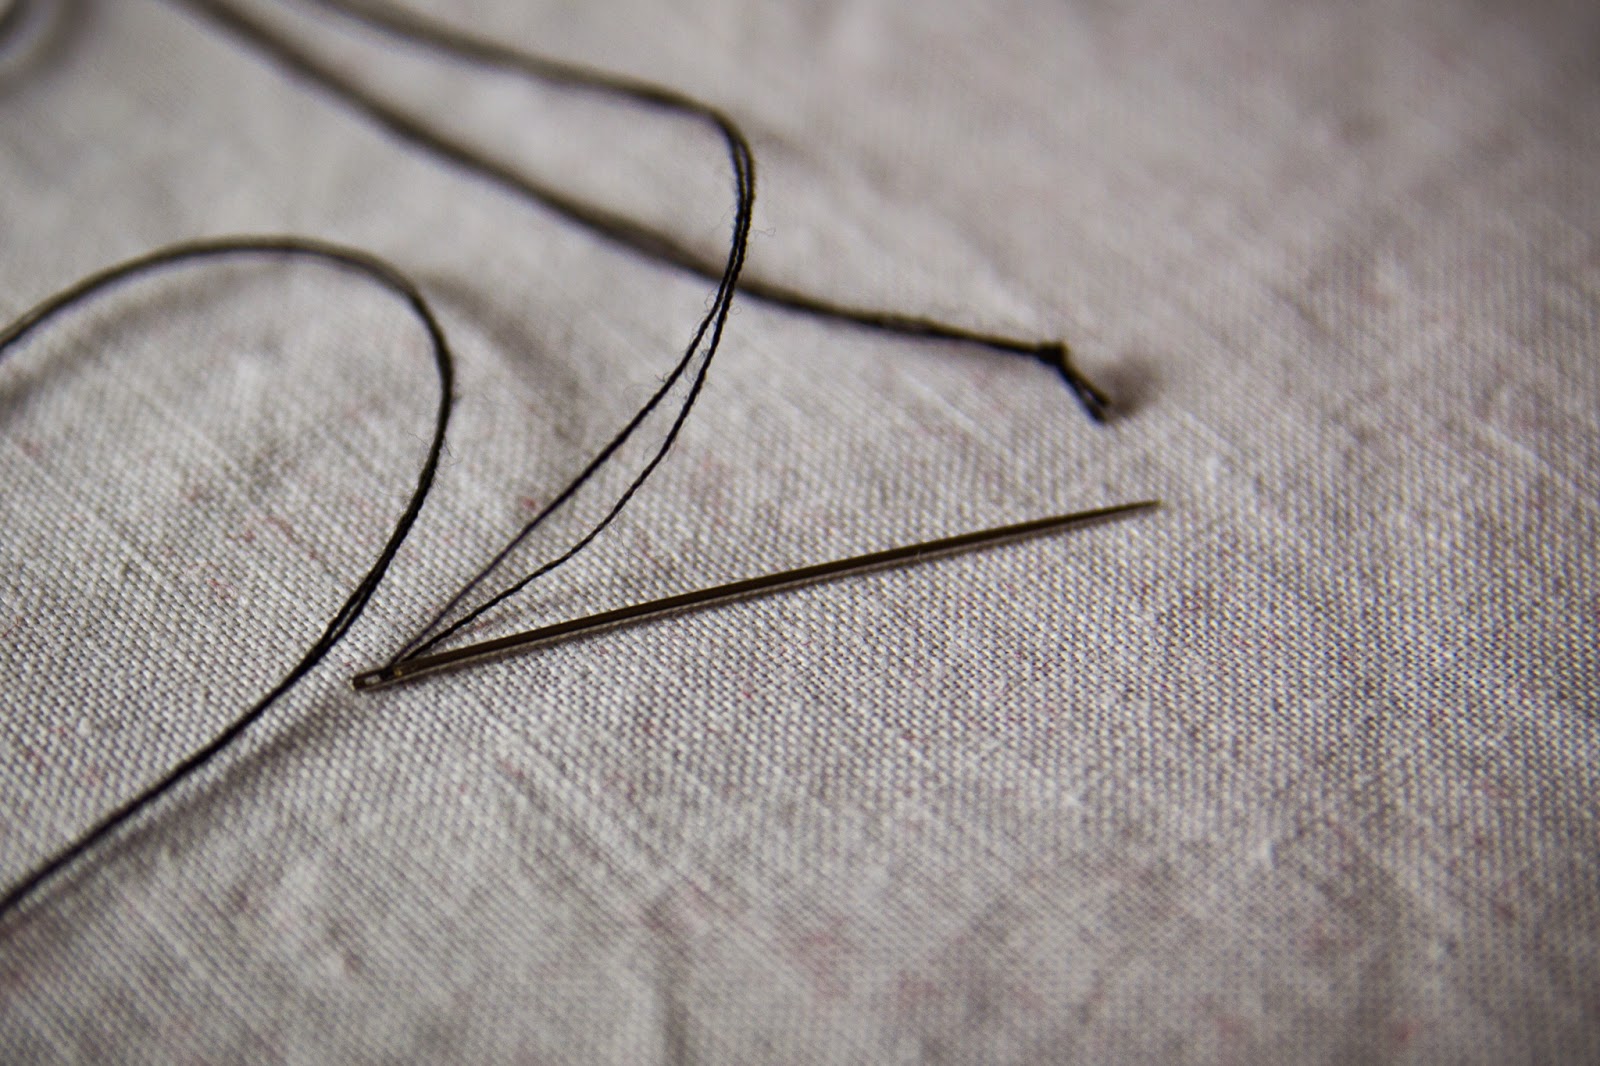
I've used 2
different coloured pieces of felt and black thread to make it easier to show how it’s put
together. This is a really basic tutorial which you can adapt very easily.
Bigger circles = bigger roses. Add more petals to make it fuller or even
embellish it with a green leaf or beads.
Eeeek.... so here goes my first tutorial.!
You Will Need:
- 1 sheet of felt
- matching thread
- needle
- sharp scissors
- 5cm paper template
- pins
- 1 brooch back (available and all good craft stores)
Step 1
First make your template. Find something aprox 5cm across to draw round. I find 5cm is a good size to make a brooch however you can make the circles larger/smaller depending on what you would like to use them for.
Step 2
Cut out 9
circles using your template. They don’t have to be perfect but pinning the
template in place will stop it from slipping and your cutting will be more accurate
Step 3
Cut 8 of your circles in half leaving one whole
(This will become the back)
Step 4
Thread about
1.5 meters of thread through your needle. Tie the ends together so that the
thread is doubled
Step 5
Sew a running stitch along the bottom of one half circles. Stop when you
come to the middle.
Step 6
Take another half circle and lay it over the first. Making sure that it
starts in the centre of the first. Continue the running stitch along the bottom
until you get to the centre of the second petal.
Step 7
Over lay a
third petal and continue the running stitch.
Step 8
Repeat this until you have used up all of your petals. When you get to
the last petal stitch all the way to the end.
Step 9
With the
needle and thread still attached – hold onto the end petal and gently pull the
thread. This should start to gather the petals. Ease the gathers down until the
petals begin to curl up
Step 10
Next you will
begin to form the rose. Starting at the end (where your needle and thread is)
roll the rose up tightly to create a curl and secure with several stitches.
Step 11
Keep coiling
the rose up securing it with little stitches as you go. The tighter you roll
the less open your rose will be.
Step 12
Once all the petals are wound and stitched in place tie off with several stitches and cut off
loose thread.
Step 13
Next take
your final circle. Place over the back of your rose. Trim down to size and
carefully stitch round the edge. This will hide the back.
Step 14
Next take
your brooch back. Secure in place with several stitches through each of the
holes and voila! One pretty rose.